Friday, September 24, 2010
Dispatchers Panel
Monday, September 20, 2010
Let the testing begin...
I found a wire that wasn't soldered good enough and one set of wires reversed, which only showed up when I tried to cross over two different blocks. It looks like I'll need to clean tracks and wheels and hopefully everything will run a little smoother.
Monday, September 13, 2010
Well most of the lights are working.....

However they aren't supposed to all be on.
During the building of the panel many things had changed and none of it was tested. When I turned everything on, nothing worked, including what was working.
I tried different things, checked wires, nothing helped. I decided to go back as far as I could and start with introducing one new thing at a time.
I first took out the new panels, but it didn't help. I took out upgraded I/O's and programs. No good. I had run a new networking scheme and noticed that one half, while it didn't work wasn't giving me errors like the other line. I disconnected the offending network bus, changed files and started up the half system. Now this side was working again. OK progress.
I went back to the other network and brought online one I/O at a time and things were starting to look up. I ran across one bad network cable (which was probably the biggest offender), I got eventually got everything I had before working and called it quits for the night.
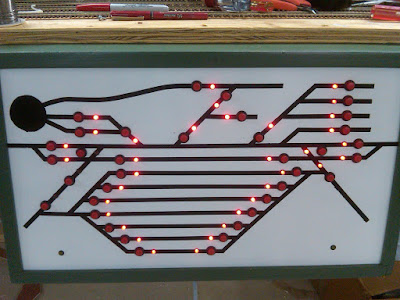
I came back down in the morning and put all the new files back in. So far so good. Now it was time to bring on the new panels. I started with the smallest I/O first. It was OK with just a small wire goof. Now the big one. I turned it on and got the lights you see above. There were data file errors, some plugs had two wires backwards, a couple of cold solder joints and "THE BIG ONE".
I just realized I'm missing a button and there is no way to put it in where it belongs. I'll have to make a new panel or come up with a work around. This panel took about a week, with all my great experience, I might be able to cut down the time in half. At least most of the soldering work is already done. The LED's would be the ones I would be required to remove for this change.
The other godd news is that everything that is installed is working correctly. Now to find a plce to put that button.
MODEL RAILROADING IS FUN..... model railroading is fun.....model railroading is fun
Saturday, September 11, 2010
The light bulb comes on
Now I have to find places to connect for the leftovers. It sure is great when a plan comes together. The good news is I can start testing this panel tomorrow.
Thursday, September 9, 2010
Portland Panel
The Portland panel started out smaller but had to be increased in size due to the addition of a few more tracks. I took a larger panel and modified it down to a comfortable size. It is still a little bigger than I would like but what are you going to do!
I was told that to a certain person I know, this next picture might be like a playboy centerfold, so I had to include it.
This is the inside of the Portland panel without the lights and wiring to make everything work. The upper right is the circuit breakers for Portland. One for the mainline and one for everything else. The big green panel on the left is the computer I/O and will be used so the computer can the see input from the buttons and send output to the lights. The other panels are where all the buttons and lights get connected. Then those boards will connect to the I/O.
I was able to get about 1/3 wired up and I couldn't stand it any more. I will take a break until tomorrow.
Tell me again, why I am doing this..........
The two wire DCC lies
Today I probably test it all.
Thursday, September 2, 2010
Update
I added three tracks in Portland yard and 4 turnouts. The tortoises are installed, but the computer program I am using has some limitations on the number of turnouts per screen page, so these turnouts are not functional in the computer yet. There are some ideas floating around on how to get around this.
I decided to do some of the odds and ends while debating how to handle my screen problems. I finally moved a workbench to the location where the dispatcher will be, so I can get all the screen set up. I added a light over this area, so the dispatcher can see. There were a bunch of sidings that did not have any track, so today seemed like a good time to install them. Three sidings had their track installed and 1 turnout that still needed to be installed. Three other sidings were prepped by installing the roadbed leading to the siding.
I have been working with the car cards to get them ready for when I want to actually host a mini Op Session.
I guess that is about it for now.


